
Partager la publication "Tubeless road bike, how to mount your tire?"
With the arrival of tubeless on the road bike, there are new gestures to acquire. The assembly is not far from that of a normal tire, but there are some subtleties…
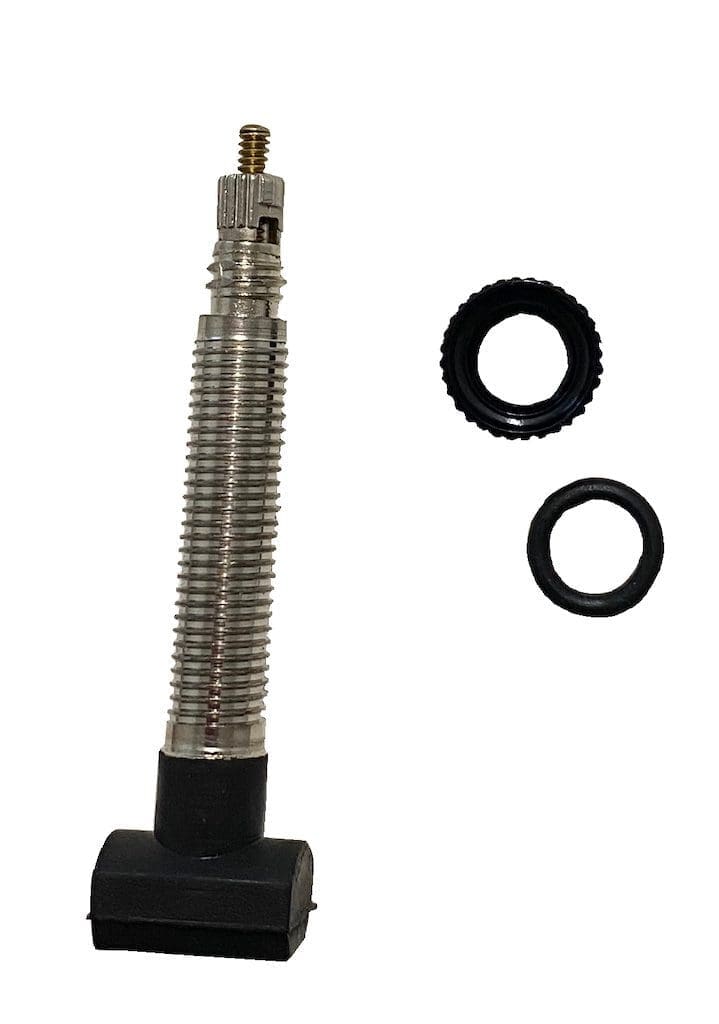
The tools
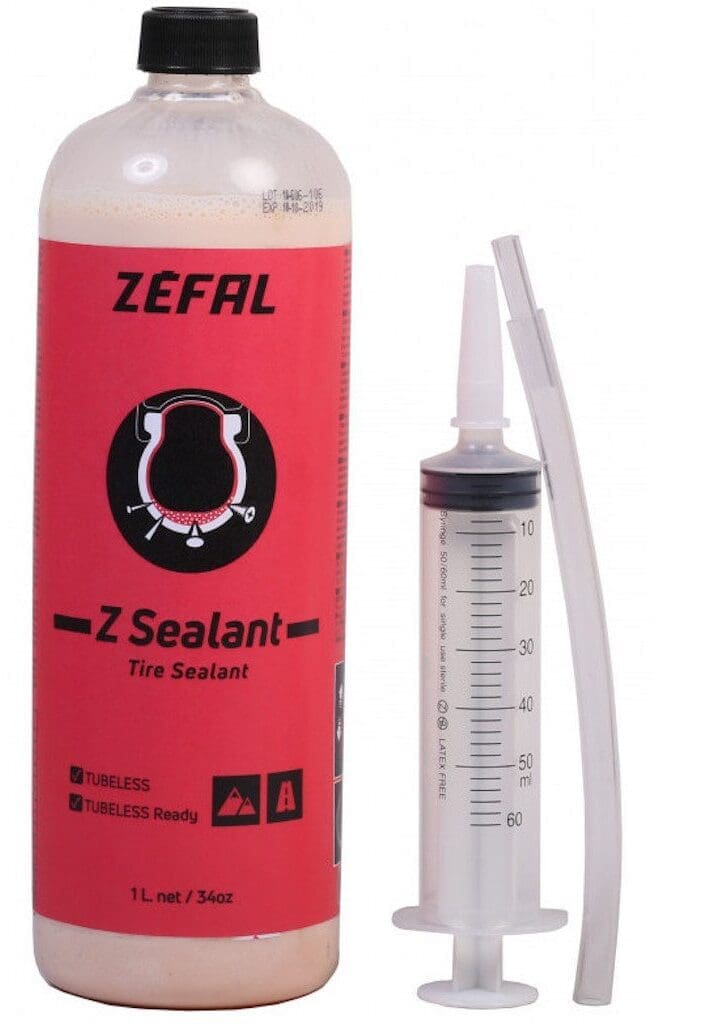
If everything is new, you will only need your hands, preventive liquid and a high-pressure pump. The ideal being that the latter is equipped with an air tank to clip the tubeless on your wheels, there are many models dedicated to the bike that are equipped with it. But we can get by without it. If it is a tubeless renewal, it may be necessary to add to this « material », a roller of rim bottom, two valves and an absorbent cloth to wipe off the preventive residue present in the rim. Especially if it is not of the same brand as the following…
Pictures © Frédéric Iehl

Time and difficulty
Here everything is related to the combination of tubeless tires and rims, even if the UST Road standard tends to be more used in the world of cycling. There are « big wheels » and « small tires » and vice versa. There are therefore longer and more « delicate » montages than others. Not more complicated but just demanding more strength. To meditate when you are considering setting up a spare air chamber by the roadside… The time ranges from 5 to 20 minutes.
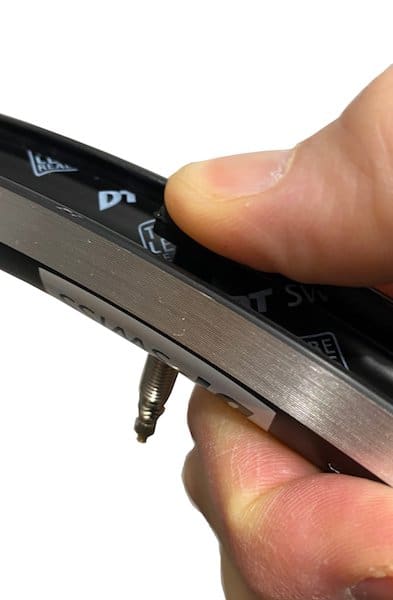
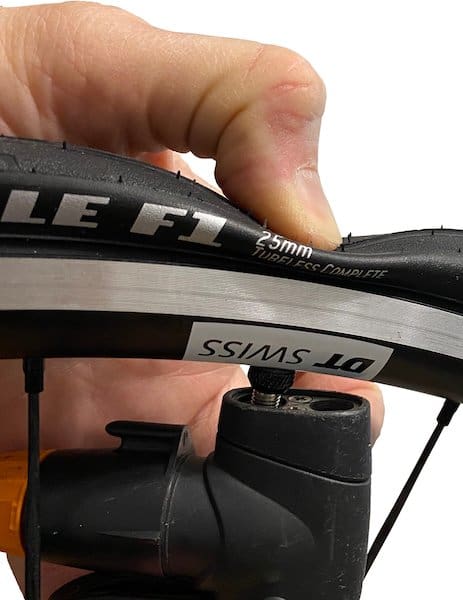
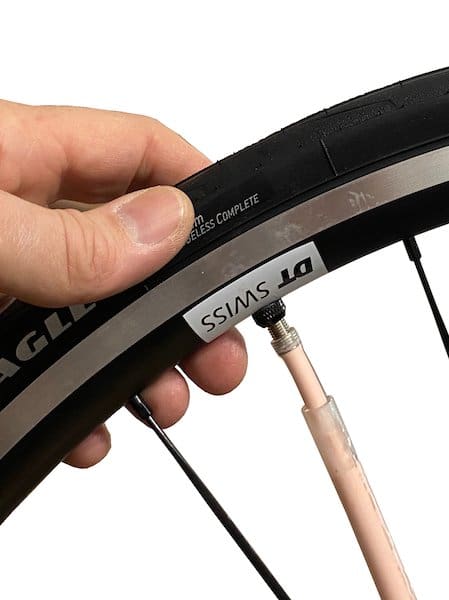
Stage 1

We make sure that the valve hole is well drilled and that the tape is not torn or detached from the rim.
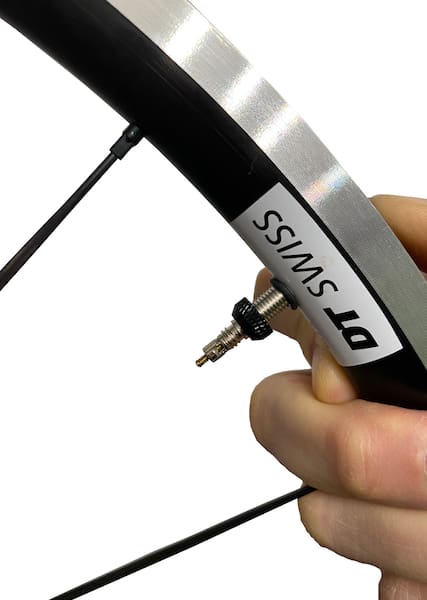
Stage 2
The ideal is almost to drill it by putting the valve in place. The valve is pushed hard against the rim.
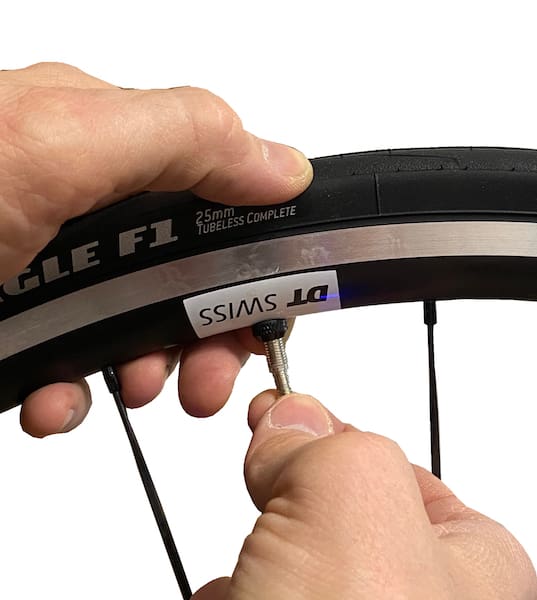
Stage 3
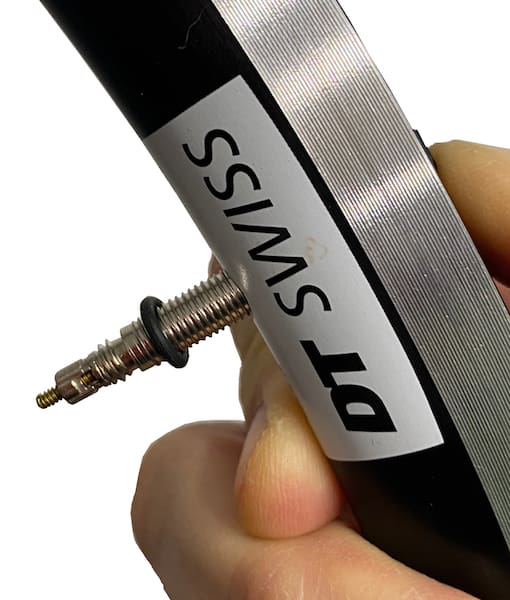
We don’t forget to set up the seal. It is flat as close as possible to the rim.
Stage 4
We then tighten the nut tightly. But be careful, we squeeze it by hand… Because if we have to put an inner tube in the tire to troubleshoot, we may not have a clamp on hand to unlock everything…
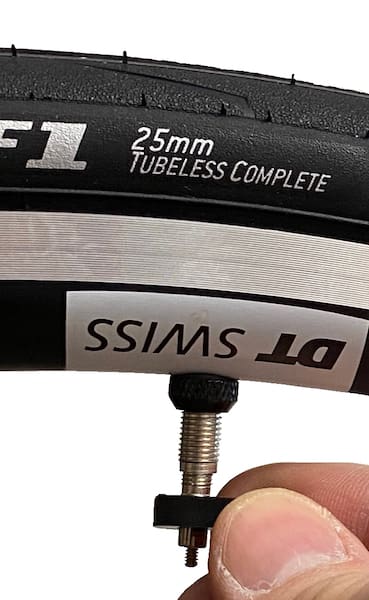
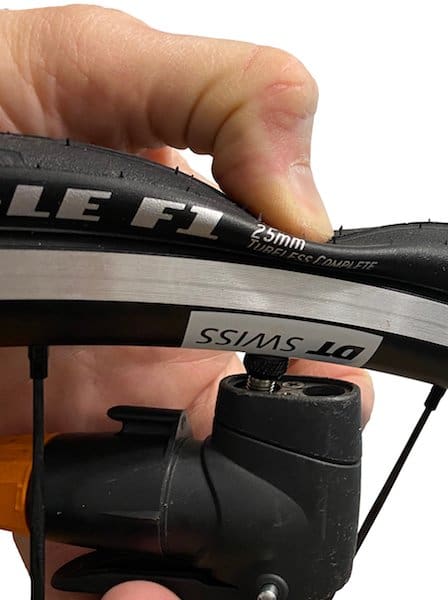
Stage 5
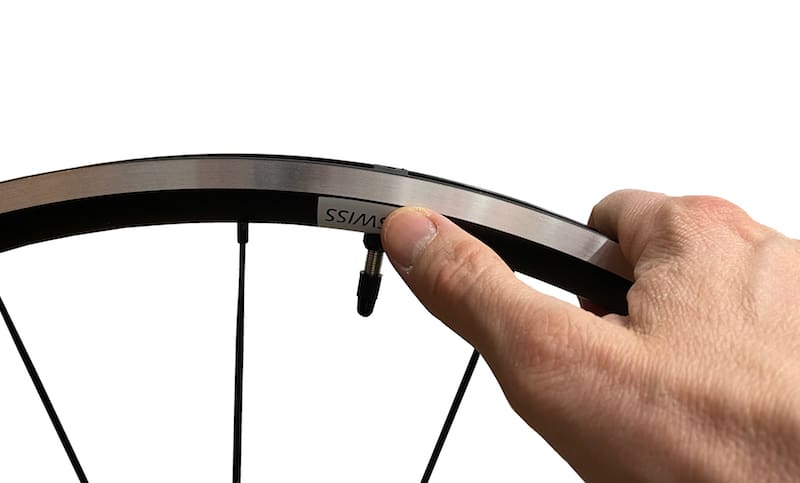
We check that the valve is perpendicular to the rim. If this is not the case, we start again…
Stage 6
The inside of the rim is also checked. The valve must be well plated at the bottom.
Stage 7
The tire is placed « around » the rim respecting its direction of travel.
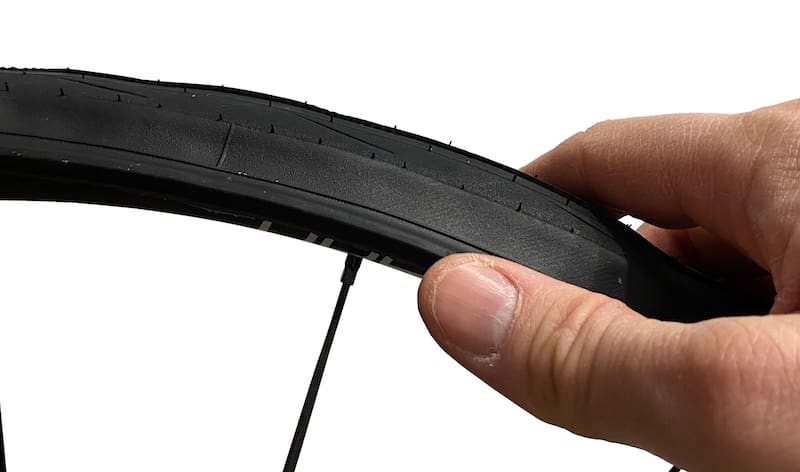
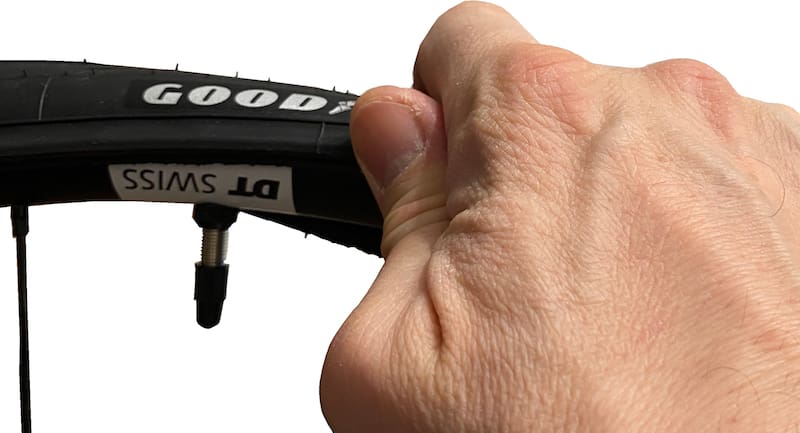
Stage 8
We begin to insert a bead opposite the valve. And we go up on both sides at the same time towards the valve. To have a little soft, the bead was placed in the center of the rim, in the throat present.
Stage 9
So we finish at the valve.
Stage 10
We put ourselves back to the opposite of the valve and enter the second bead. We go up from both sides at once towards the valve. Don’t forget to place the bead in the central throat.
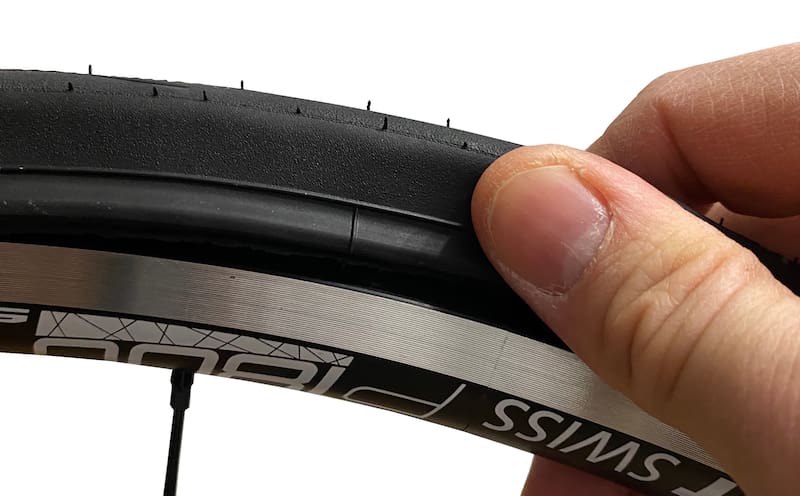
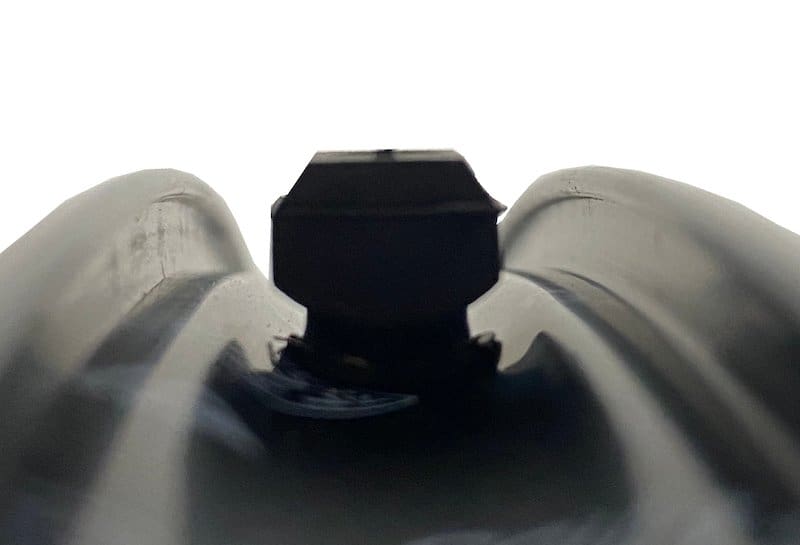
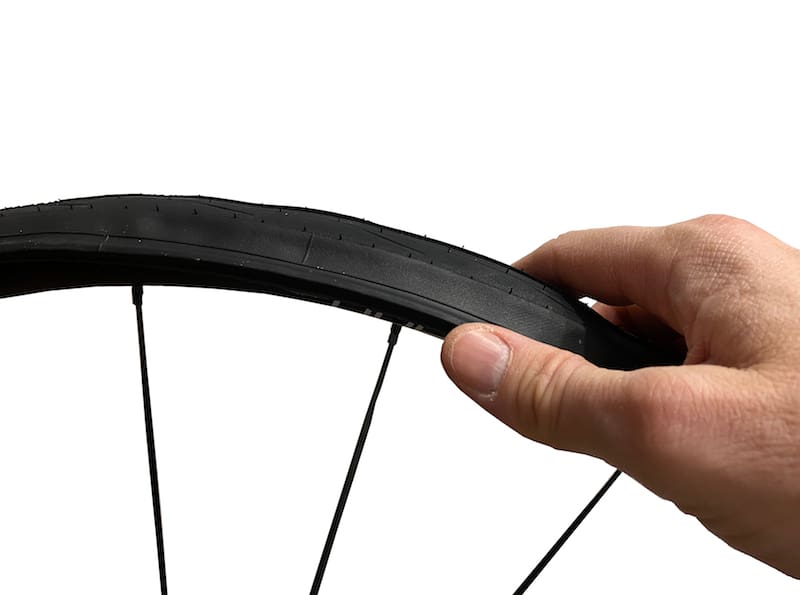
Stage 11
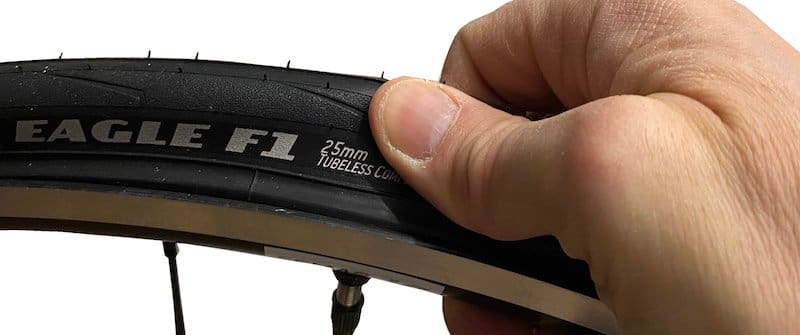
It’s the most painful moment. To place the bead in its last centimeters, you need to have enough slack… and strength in your thumbs. We forget the tire removers!
Stage 12
If you have a pump with an air tank, inflate it. Otherwise, try to plug the valve by pressing the tire with one hand. On the other hand, you will increase the pressure. Relax the tire, it should get in shape. Then pump quickly until you hear « noise sounds » indicating that the tire is clipped. Then go to the lowest maximum pressure between that of the tire or rim.
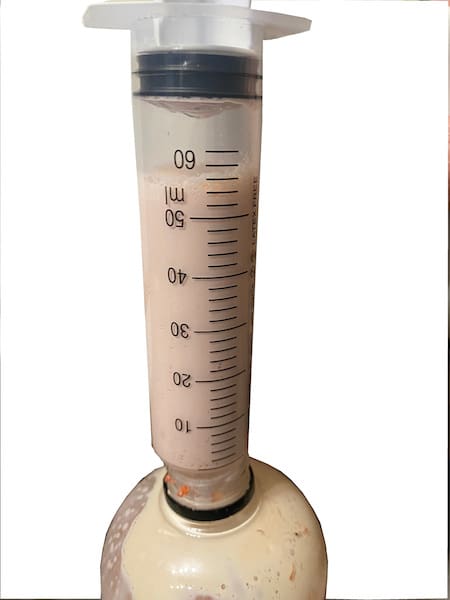
Stage 13
We will have to inject the preventive. To do this, the valve shell is disassembled. With a tool that comes with the valves or pliers. We purge the tire of its air.
Stage 14
We will fill the syringe with at least 60 ml of liquid. Why didn’t we put the liquid in the tire before passing the second bead? Because it is not clipped and the liquid has every opportunity to escape between the beads and the rim…
Stage 15
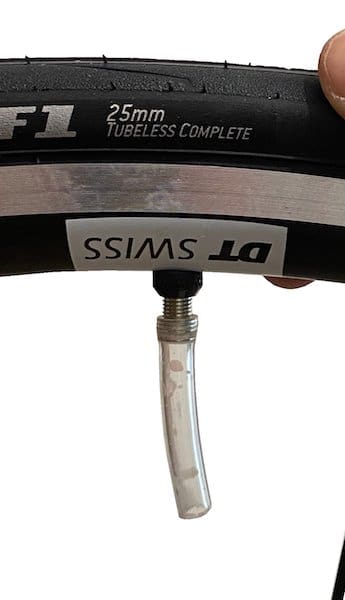
In the case of the Zefal Z-Sealant preventive liquid, a first tube is attached to the valve. It will ensure the seal with that of the syringe.
Stage 16
Put the valve at 10 or 11 o’clock, this allows the liquid to flow into the tubeless. Inject it slowly. It will be used to make the tubeless-rim connection waterproof and limit punctures, a wound of the bike!
Stage 17
The fittings are removed and the valve is fully retreaded. Avoid touching the sides of the tire.
Stage 18
We inflate by injecting a lot of air, because it is possible that the tire has unclipped. With a tubeless that has already rolled, it’s more common, so be careful. Bring the pressure to the maximum allowed by the tubeless or rim. You may hear « clacks » or air leaks…
Stage 19

Rotate your wheel to distribute the liquid evenly throughout the carcass. Your tubeless is then close and it’s time to go out by bike! If your bike is flat for no reason after a while without going out, inflate your wheels, turn them and it should be fine. The preventive liquid ages and disappears. Put it back at least three times a year to be quiet and after each big « self-repaired » puncture.