Adjustment of Campagnolo 10 and 11 speed derailleurs

Partager la publication "Adjustment of Campagnolo 10 and 11 speed derailleurs"
The installation of the derailleurs and the adjustment of their races remain a fairly easy operation overall when the right precautions are taken.
The tools
To adjust the Campagnolo derailleurs, you will have to deal with the screws that hold the derailleurs hanger on your frame and on the generation of your Campagnolo equipment. Here we need 2.5 and 3 mm allen wrenches for the legs, and a 5 mm allen wrench for Campagnolo 10-speed derailleurs. On 11-speed derailleurs you will need an additional Torx T25 key. In any case, it will be imperative to have a Phillips screwdriver to adjust the races and a torque wrench to finish the tightening.
Pictures © Frédéric Iehl

2.5 and 3 mm Allen keys are usually required to tighten the derailleur hanger. 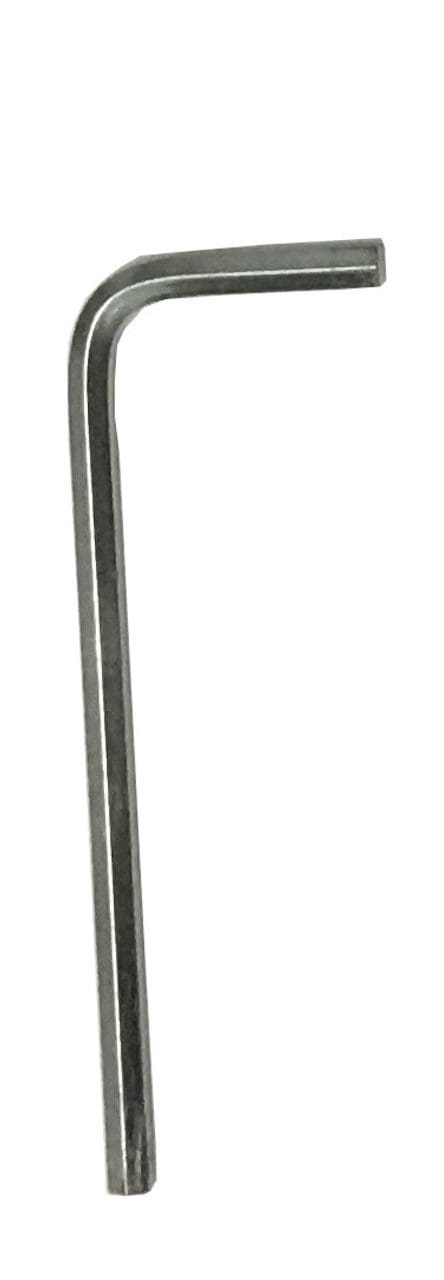
The fixing of the derailleurs and the tightening of the cables are usually done with a 5 mm key. 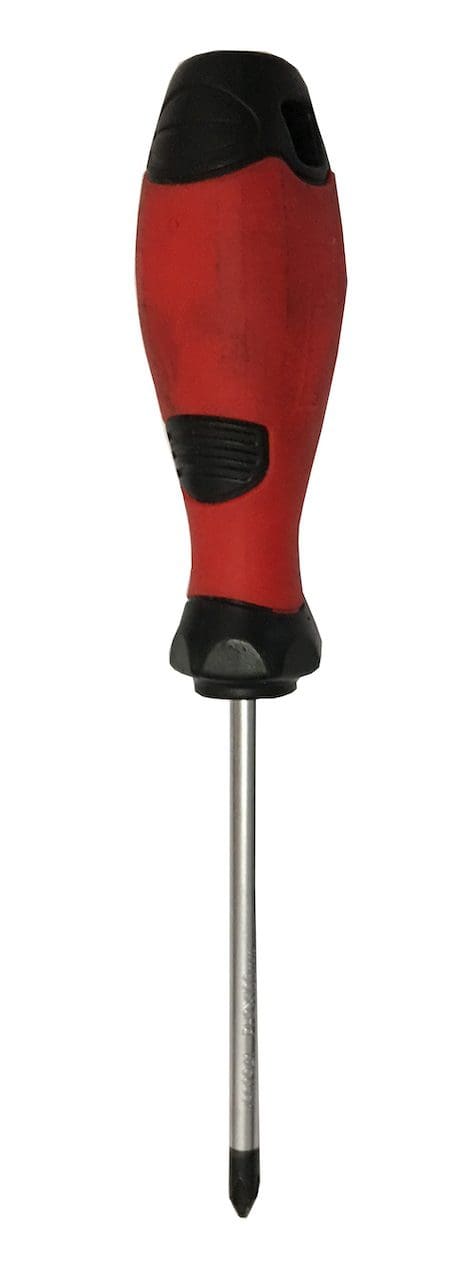
To adjust the races of the derailleurs it will be necessary to use a cruciform screwdriver. 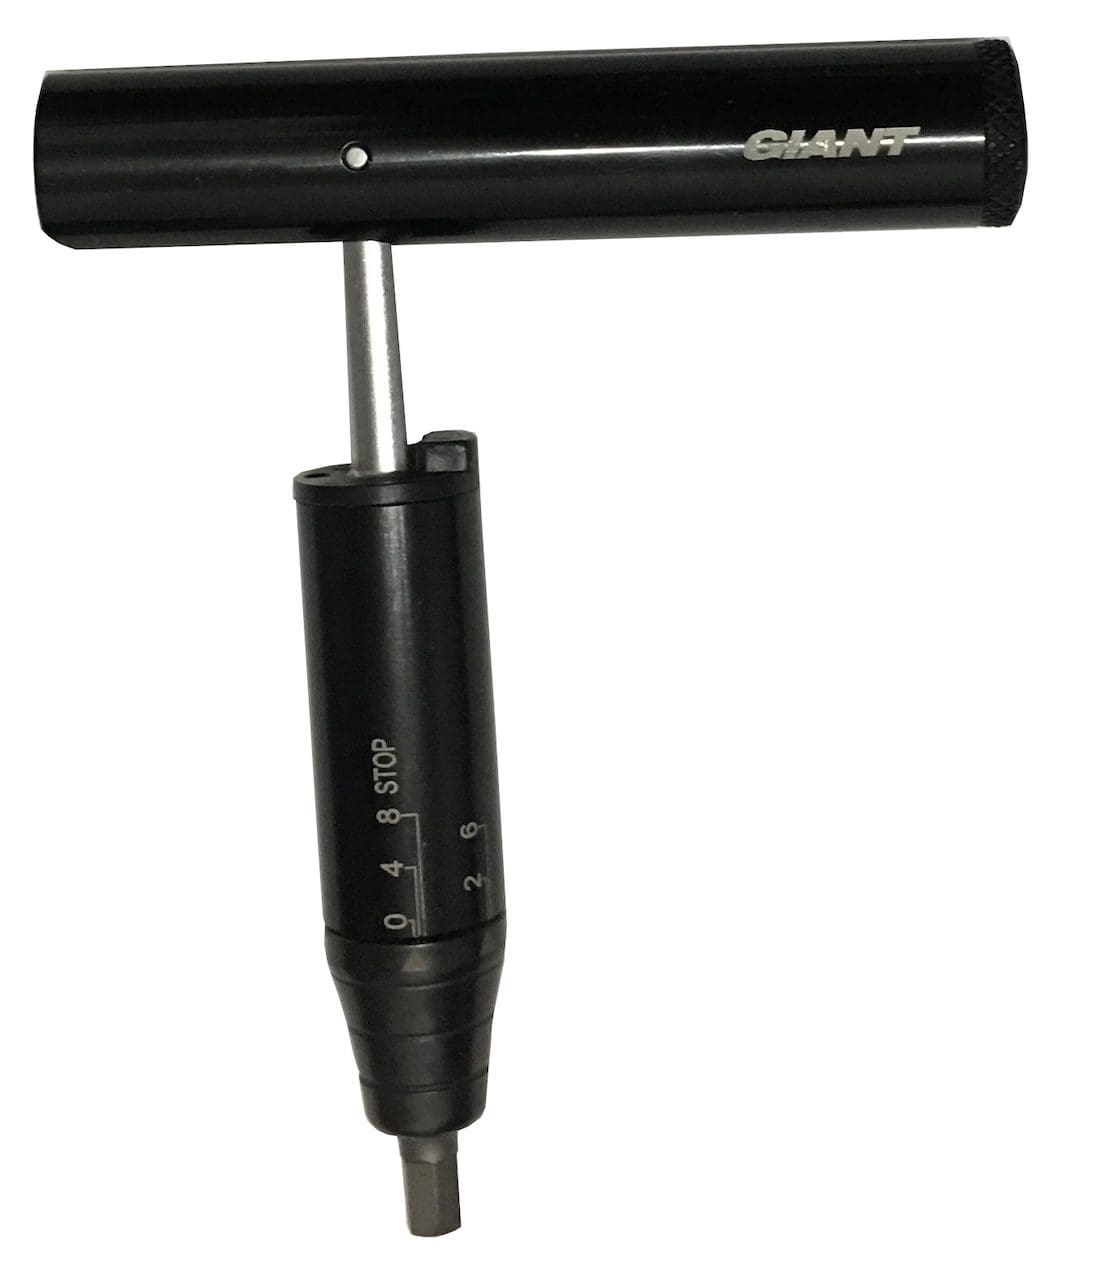
The torque wrench will be used to finish the tightening.
Time and difficulty
It will not take you less than an hour to adjust Campagnolo derailleurs. It is not the manipulations that are difficult, it is the things that can be discovered when they are made. We will say that the level of difficulty is average…
Stage 1
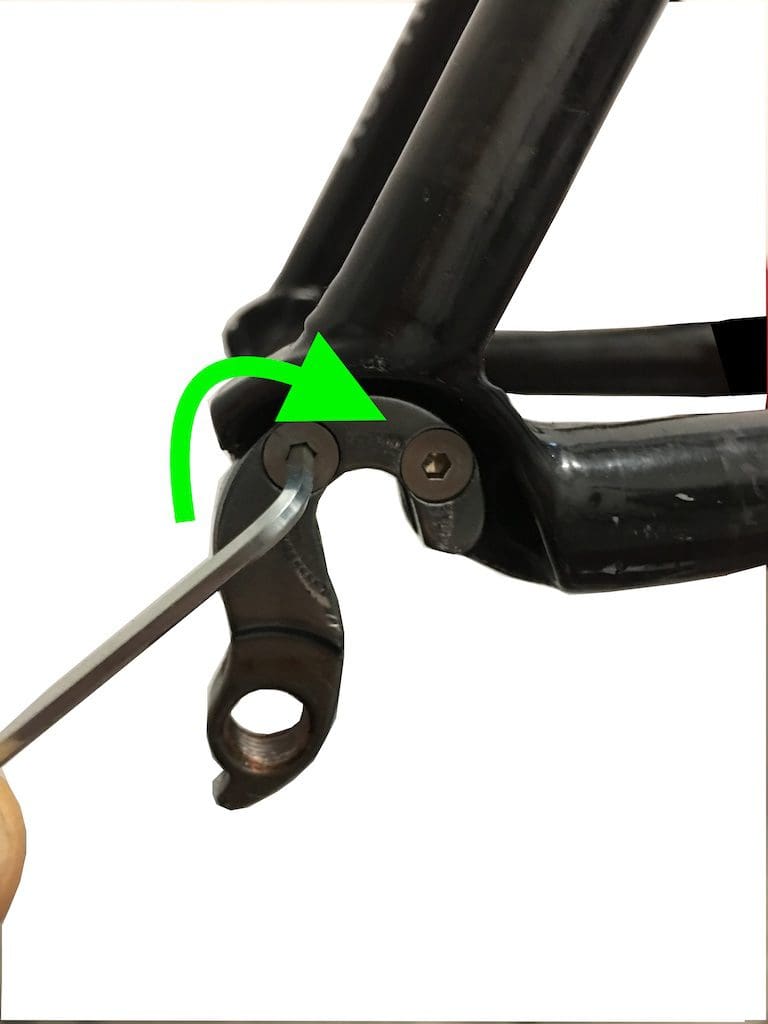
We start by tightening the rear derailleur hanger. Hoping that it is not twisted. Otherwise, it will have to be straightened or changed.
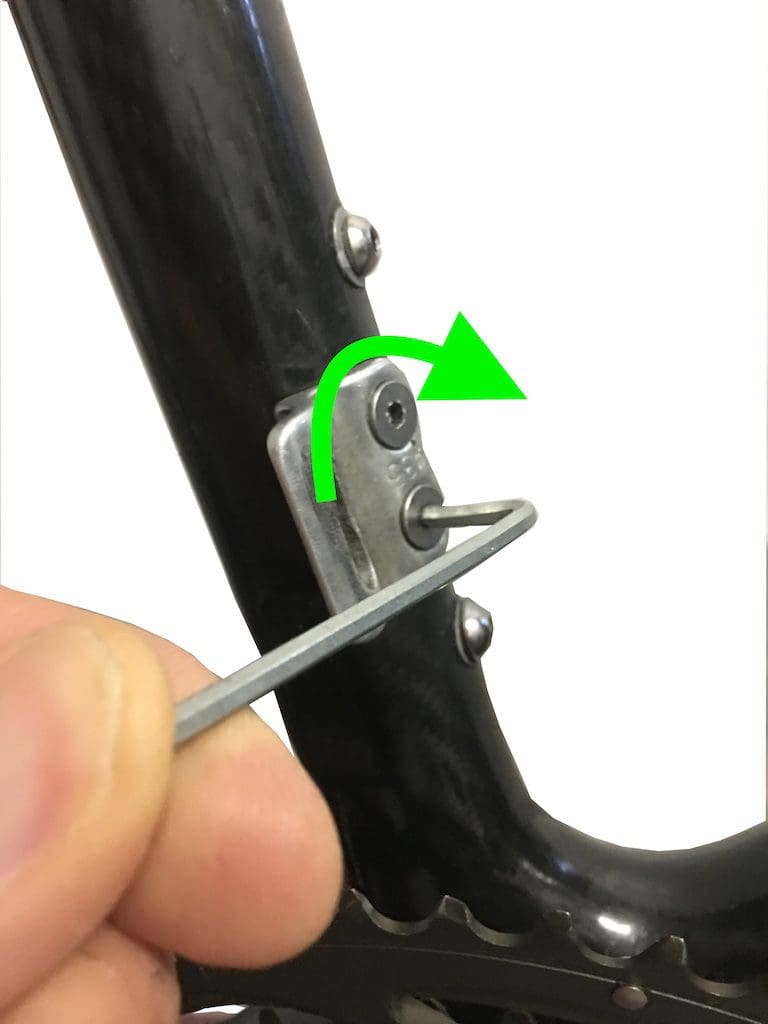
Stage 2
The screws of the front derailleur hanger are also tightened.
Stage 3
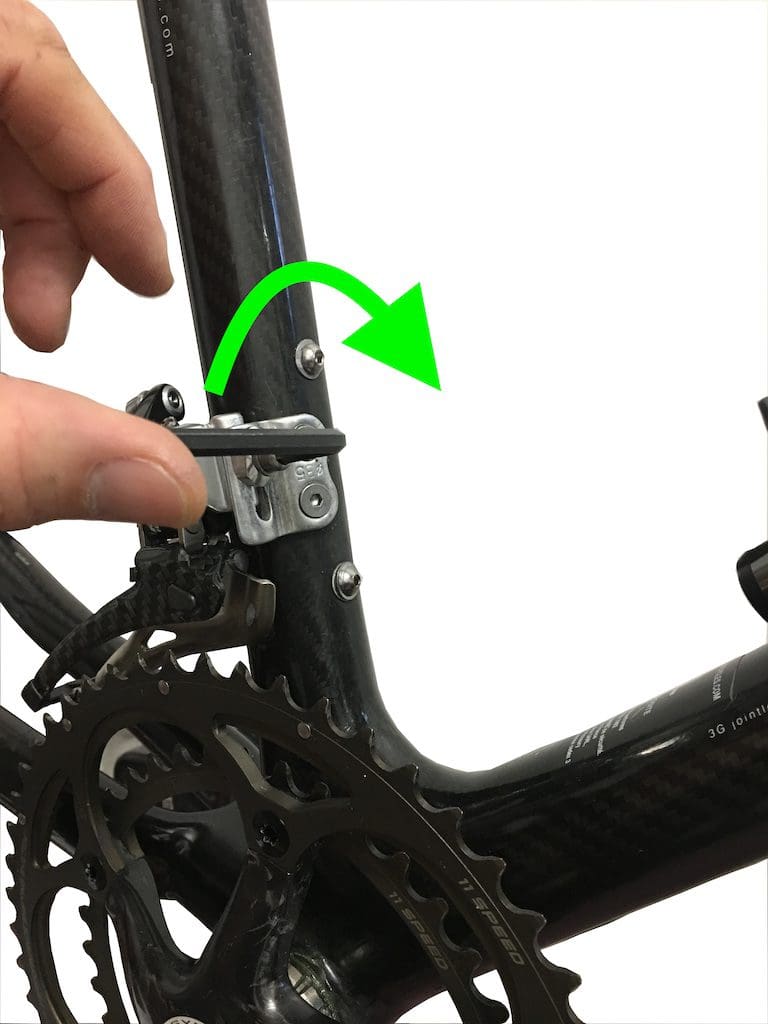
The front derailleur is fixed. Enough for it not to fall, but not too much for it to remain mobile.
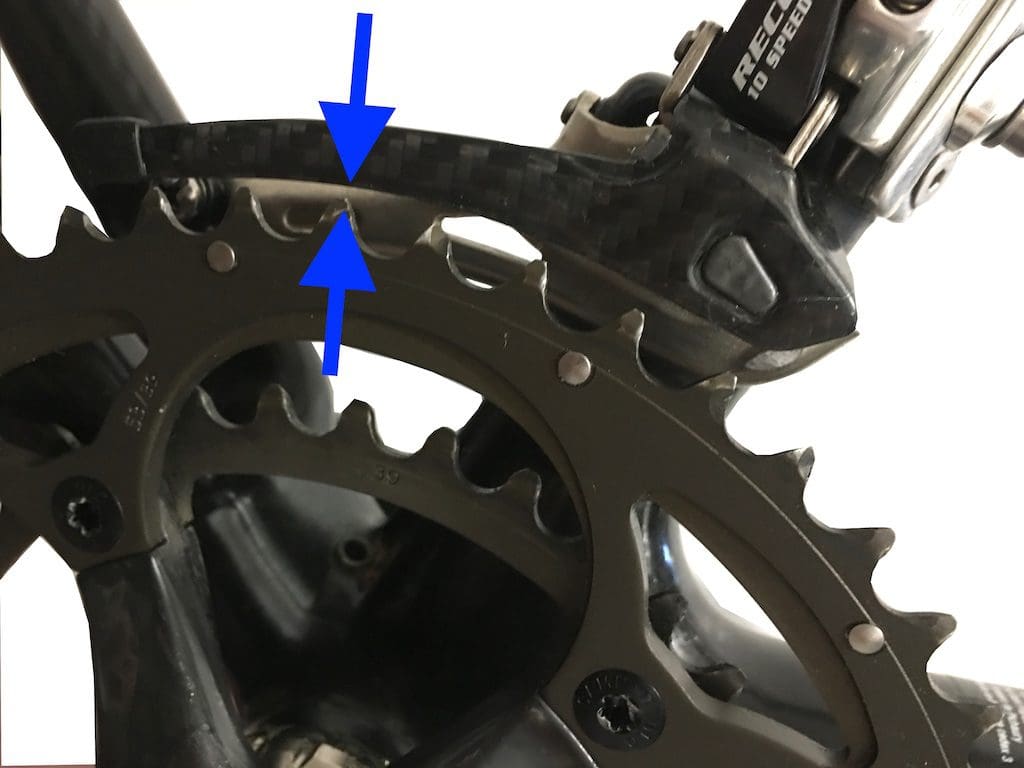
Stage 4
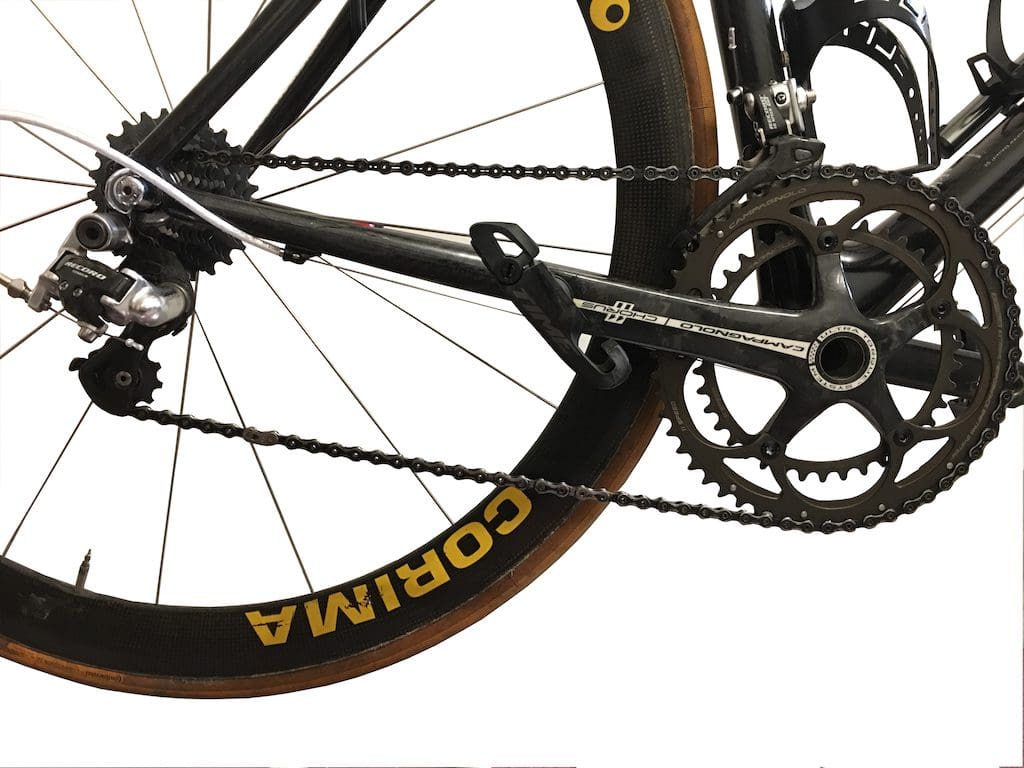
We arrange for the lower curve of the fork to pass 2 or 3 mm from the top of the teeth of the large chainring.
Stage 5
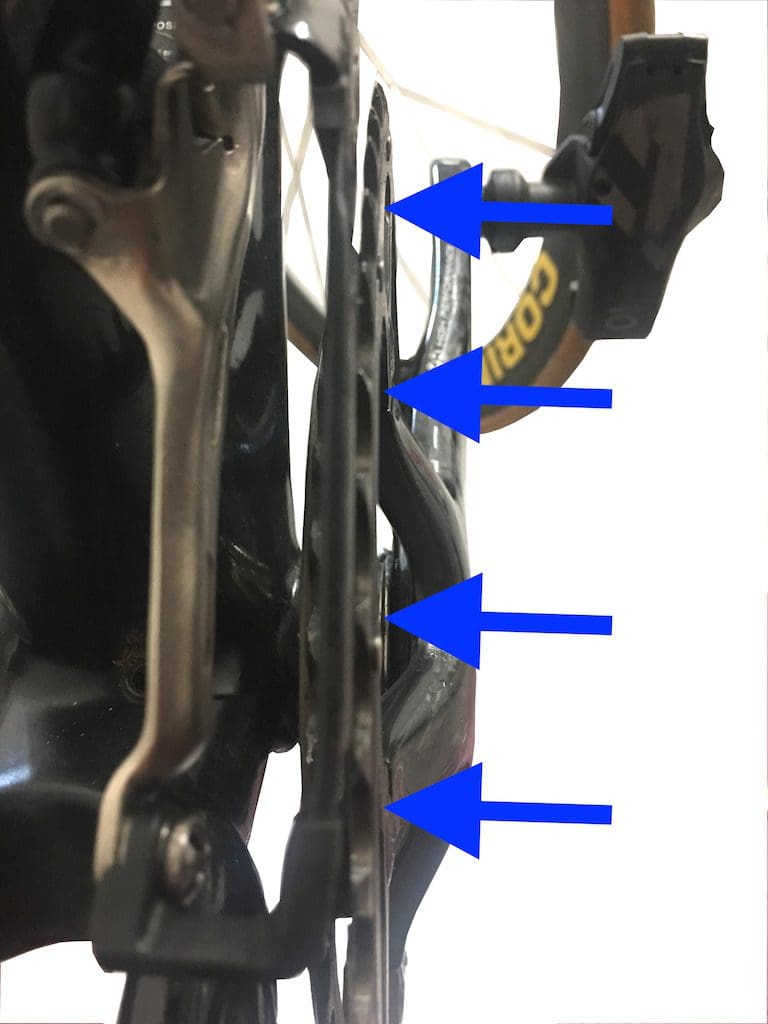
The outer part of the fork must also be as parallel as possible to the teeth of the large chainring.
Stage 6
This is done to block the front derailleur.
Stage 7
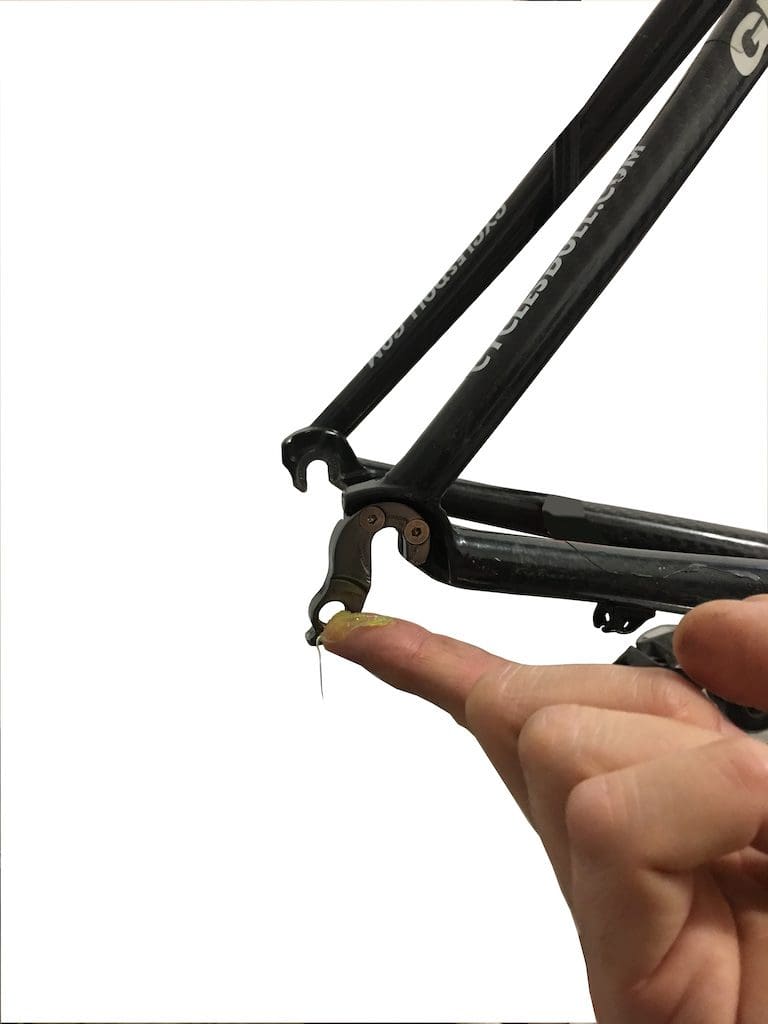
We grease the thread of the rear derailleur hanger.
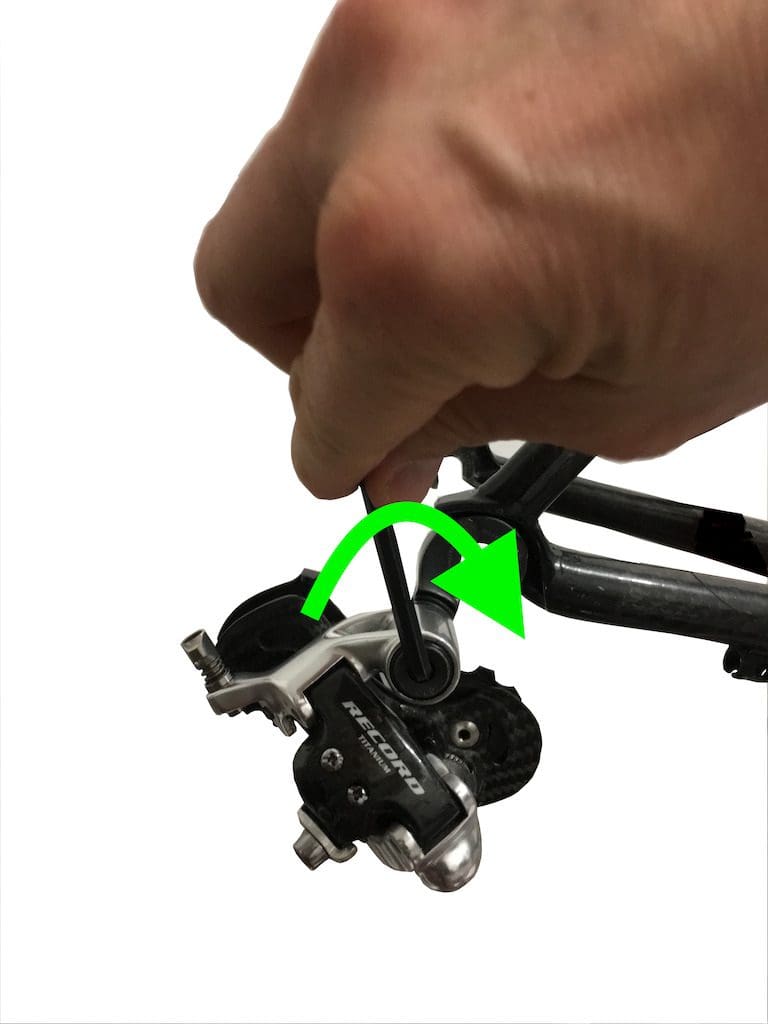
Stage 8
We will place the rear derailleur in the derailleur hanger and tighten it.
When you put it in place, you are careful not to block its stop against the derailleur hanger.
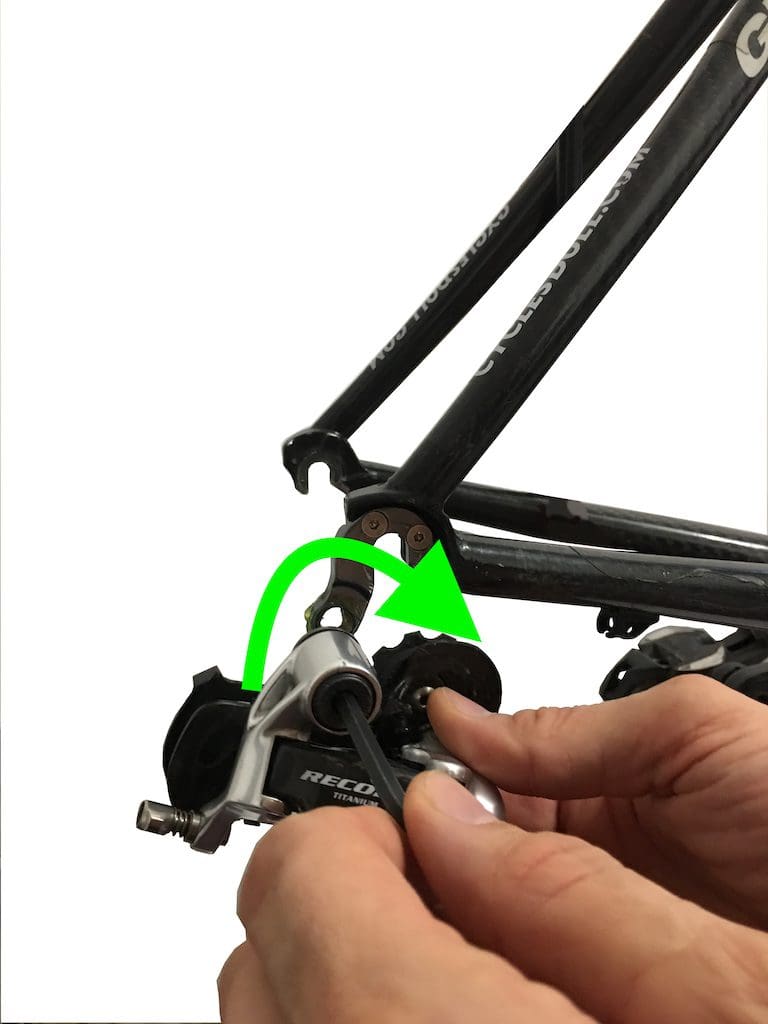
Stage 9
Before blocking it, we make sure that it remains mobile.
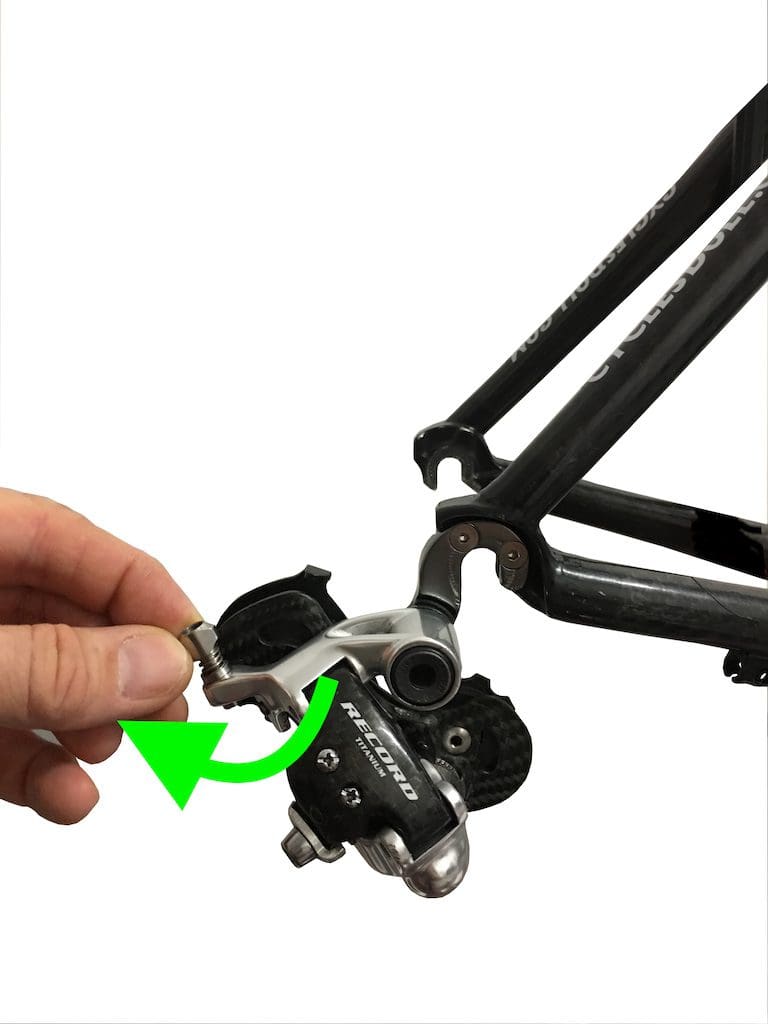
We block it and recheck its mobility.
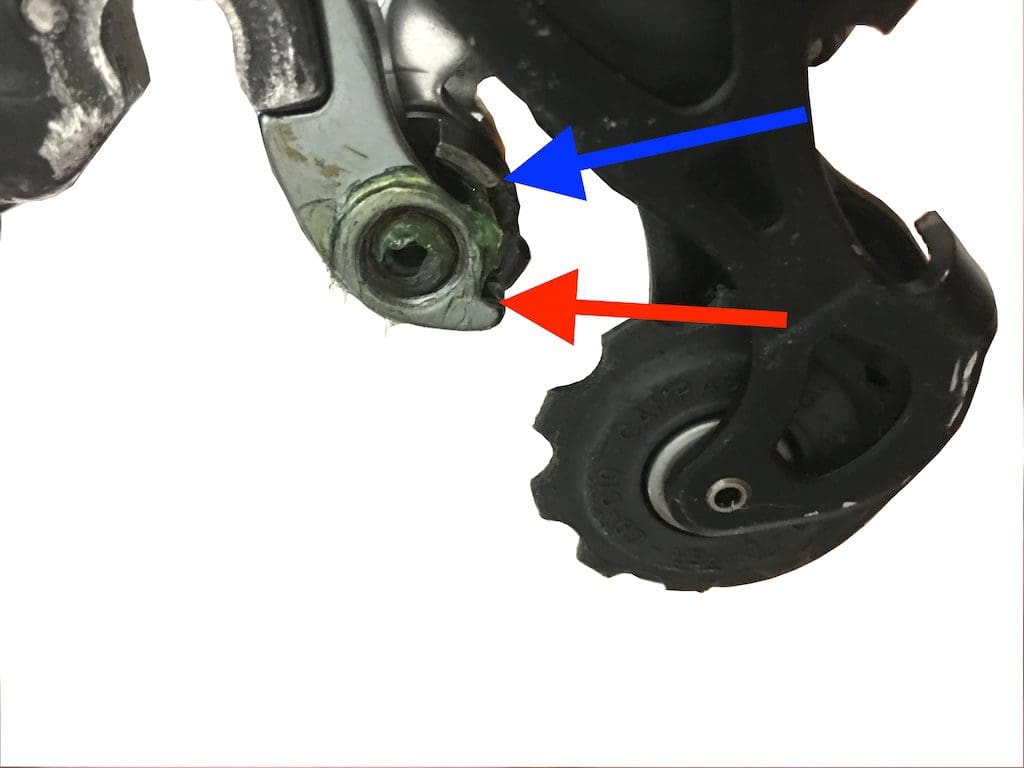
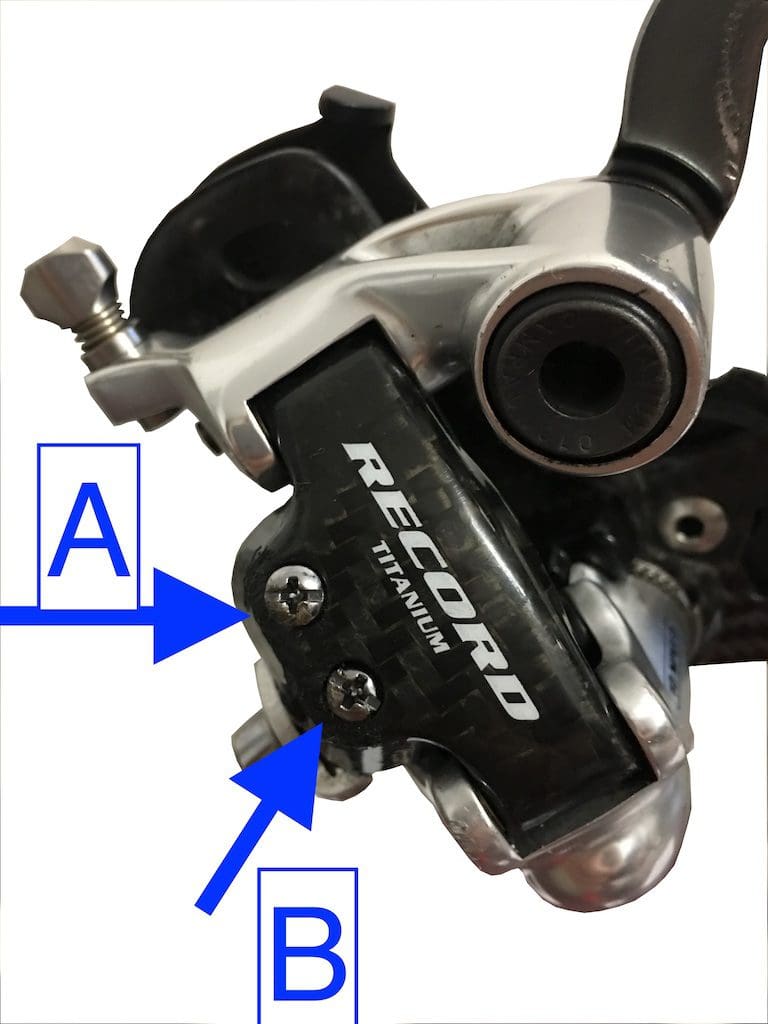
Stage 10
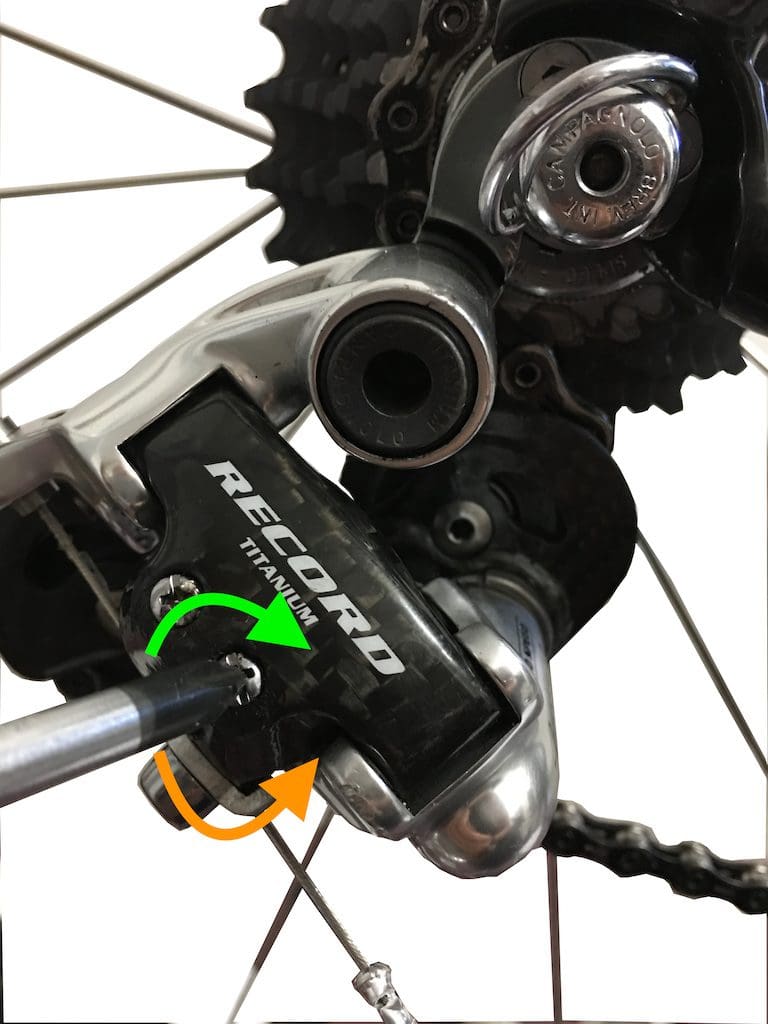
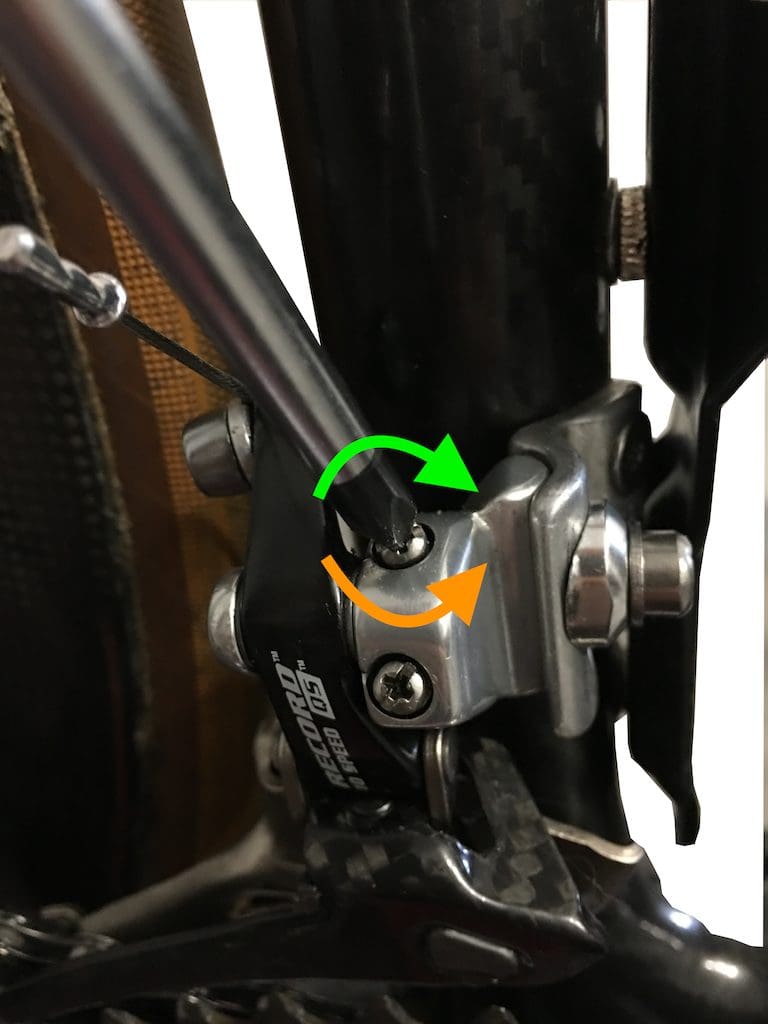
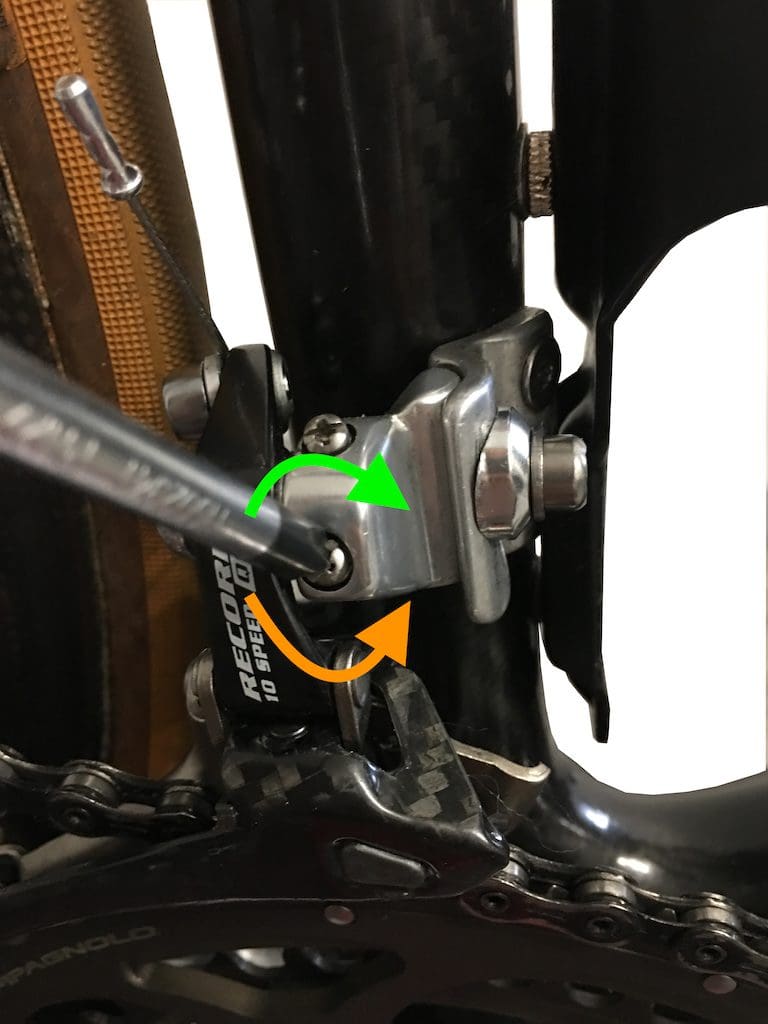
There are two screws on the external link. The « A » is to limit the race of the large gable, the « B » is for that of the small.
Stage 11
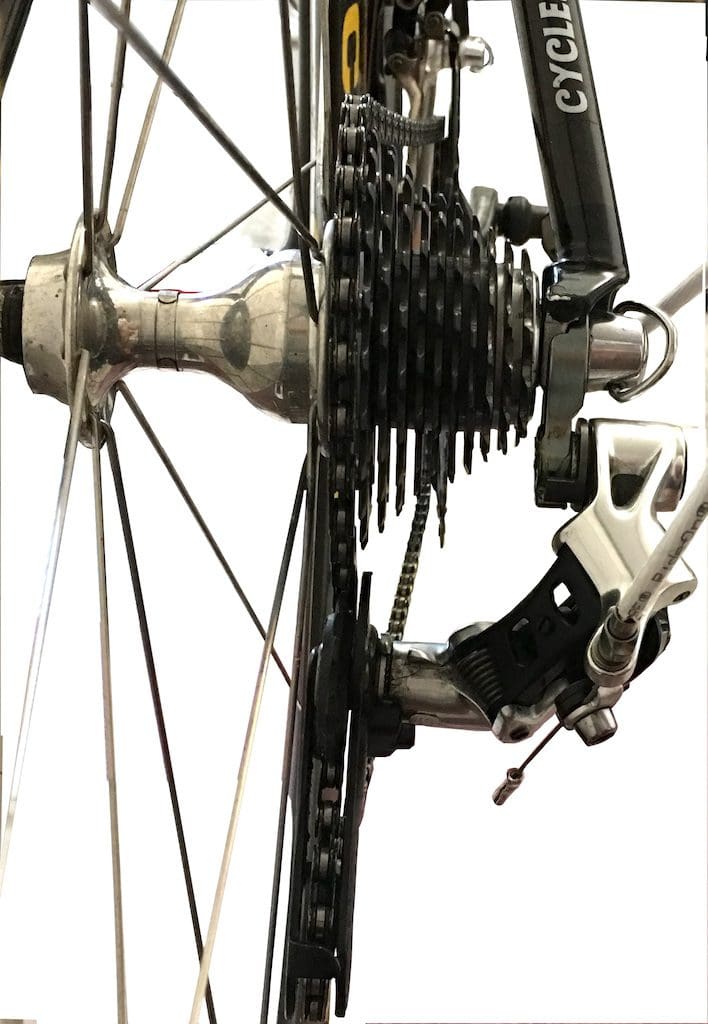
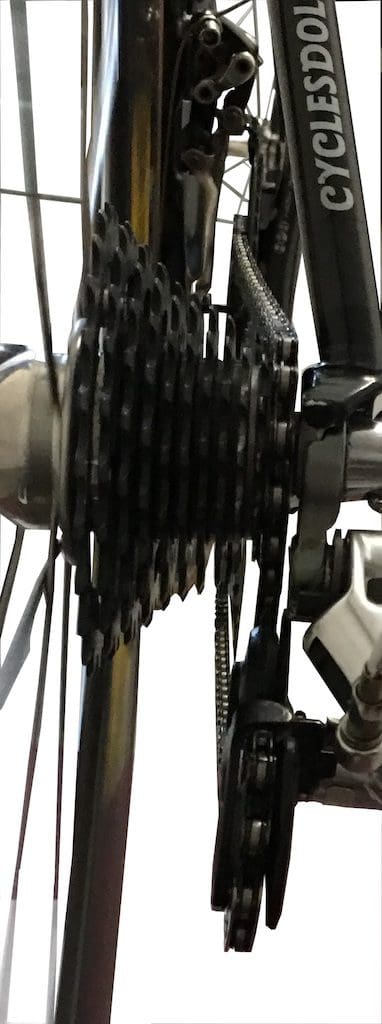
Small chainring large sprocket, we make sure that the pulleys do not touch the spokes and that the chain engages well.
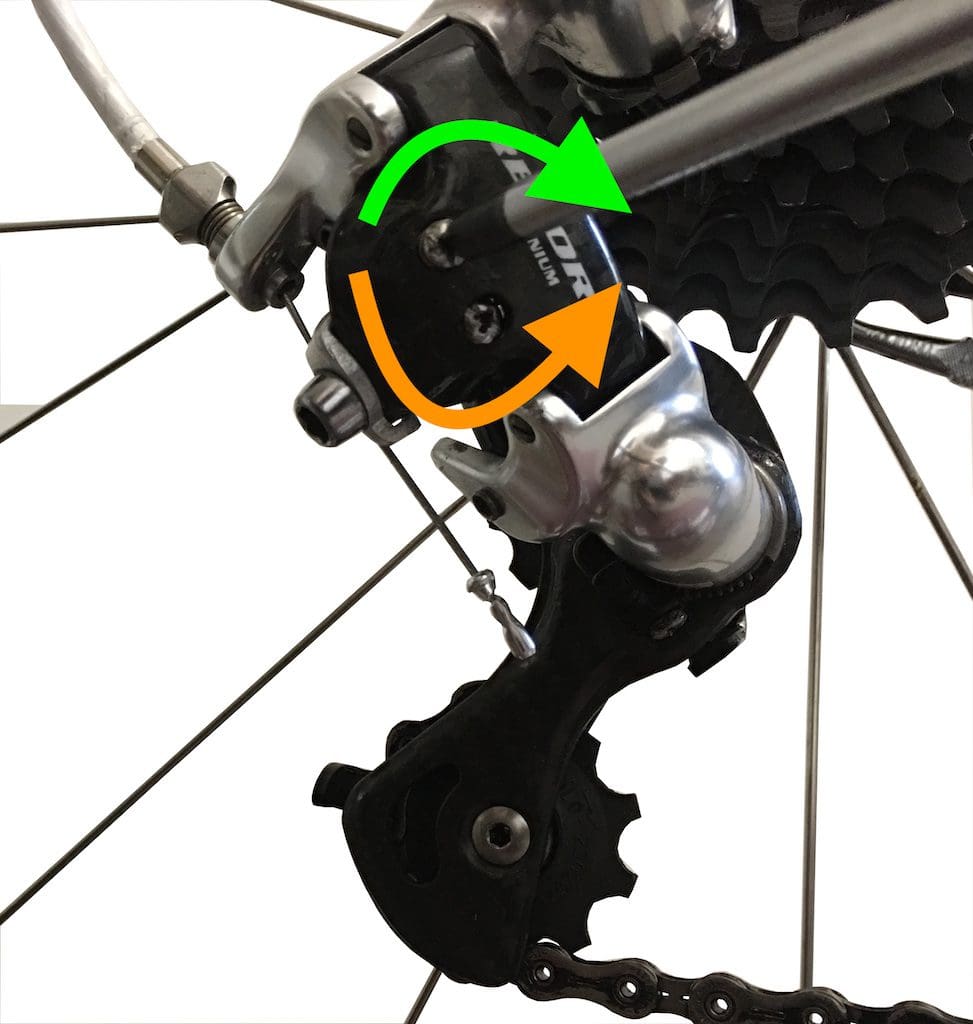
If the derailleur goes too far towards the wheel, the « A » screw (green arrow) is tightened. If the chain does not climb on the last pinion, we loosen the « A » screw a little (orange arrow).
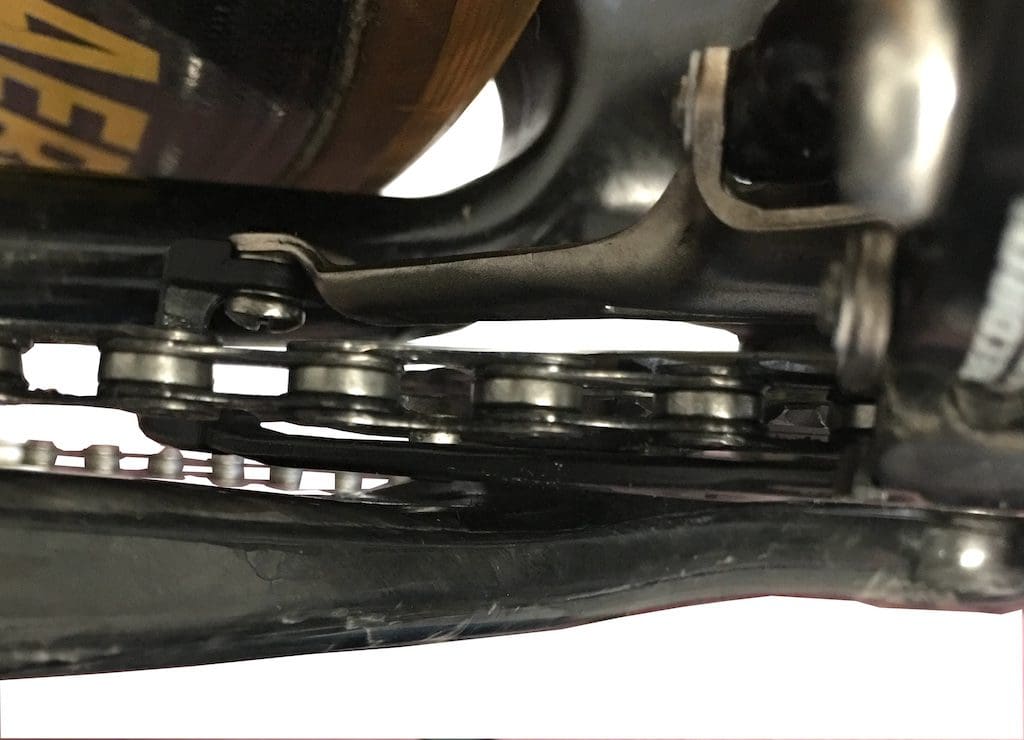
Stage 12
We put the chain on the smallest sprockets now for external timing
If the chain rubs on the frame, the « B » screw (green arrow) is tightened. If it has trouble passing on the small sprocket, loosen the « B » screw (orange arrow).
Stage 13
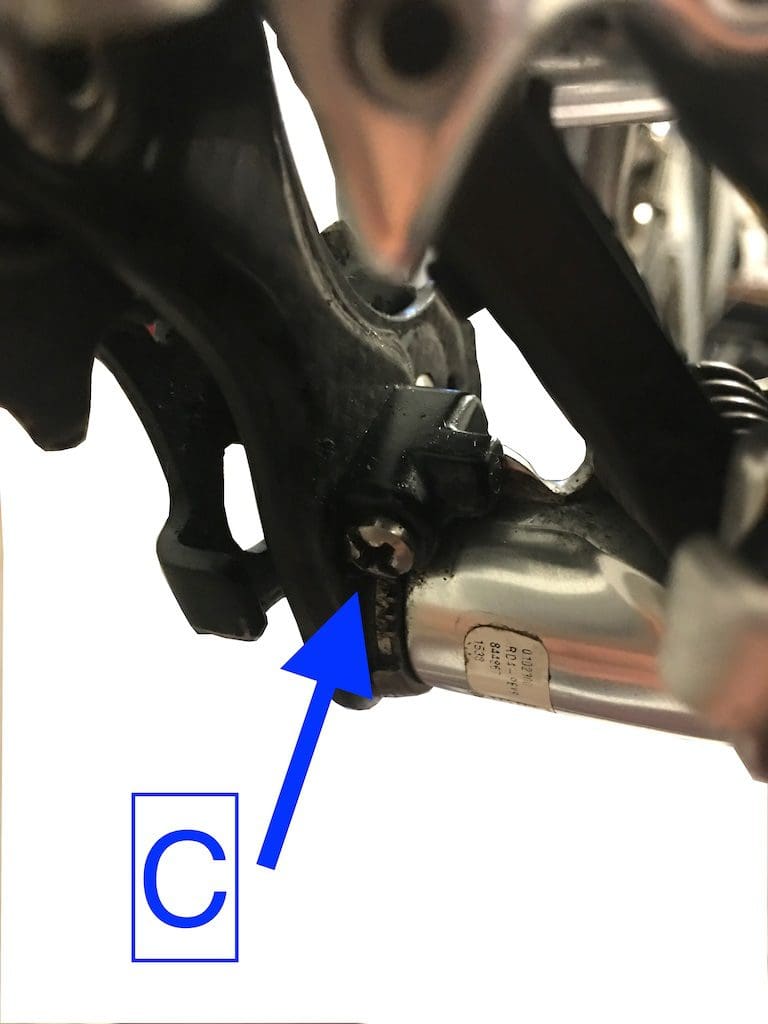
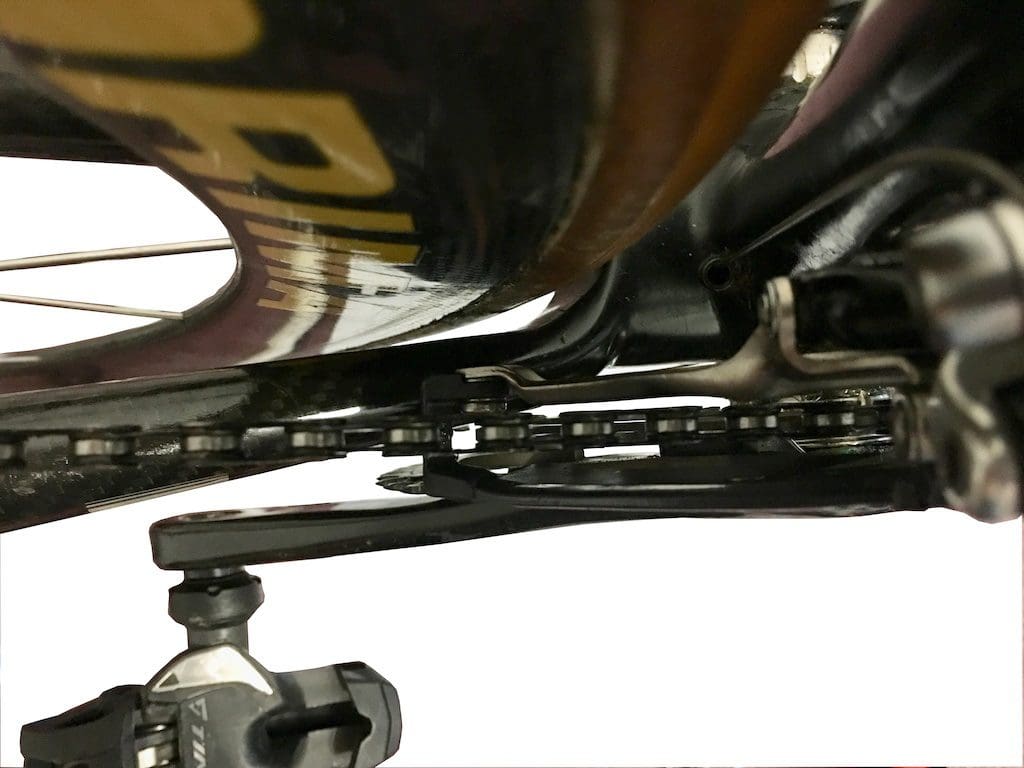
This « C » screw below manages the tension of the screed and the proximity of the rollers and sprockets.
On the small chainring and the large sprocket, it is arranged for the pebble to pass at least 5 mm from the teeth of the sprocket. When you tighten (green arrow) you move it away, when you loosen (orange arrow) you bring it closer.
Stage 14
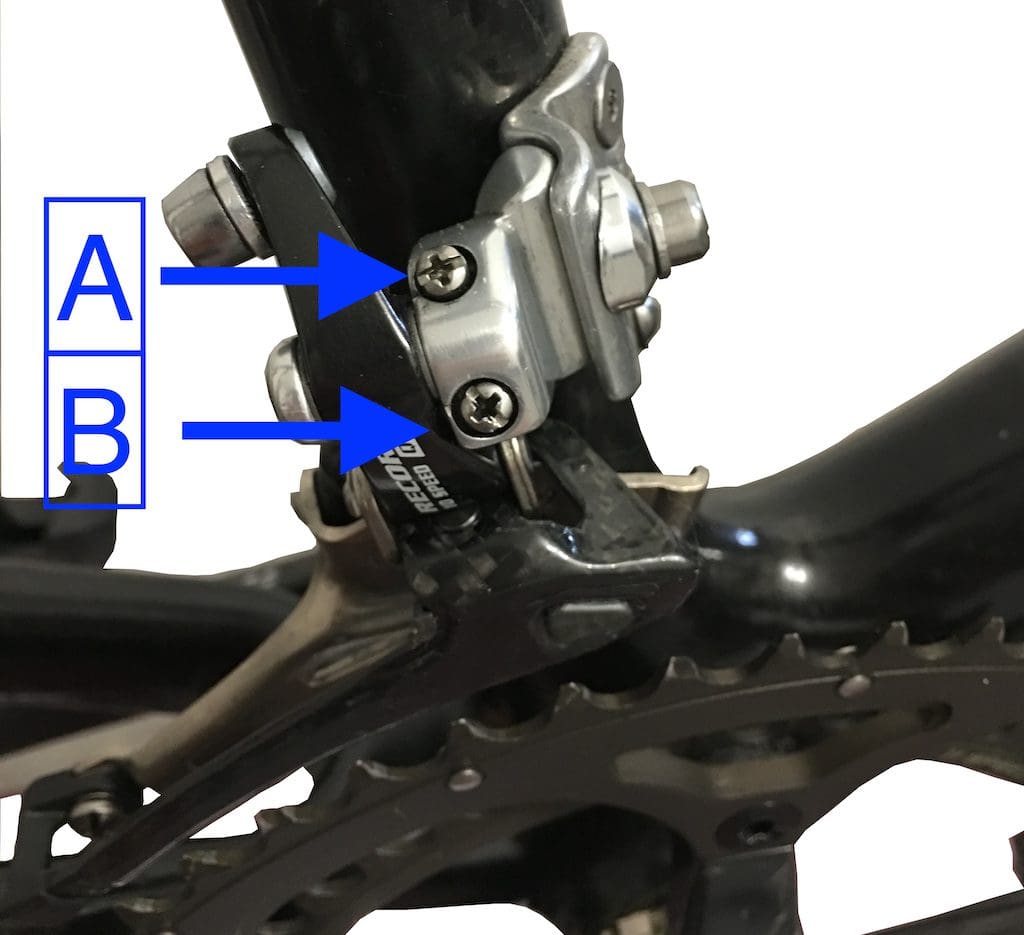
The front derailleur also has two screws. The « A » settles the race on the small plateau, the « B » the one on the large plateau.
Stage 15
We put ourselves on the big sprocket and the small chainring.
We then try to « stick » the left side of the fork as close as possible to the chain.
Screw the « A » screw (green arrow) to bring the fork closer to the chain, or loosen it (orange arrow) to move it away.
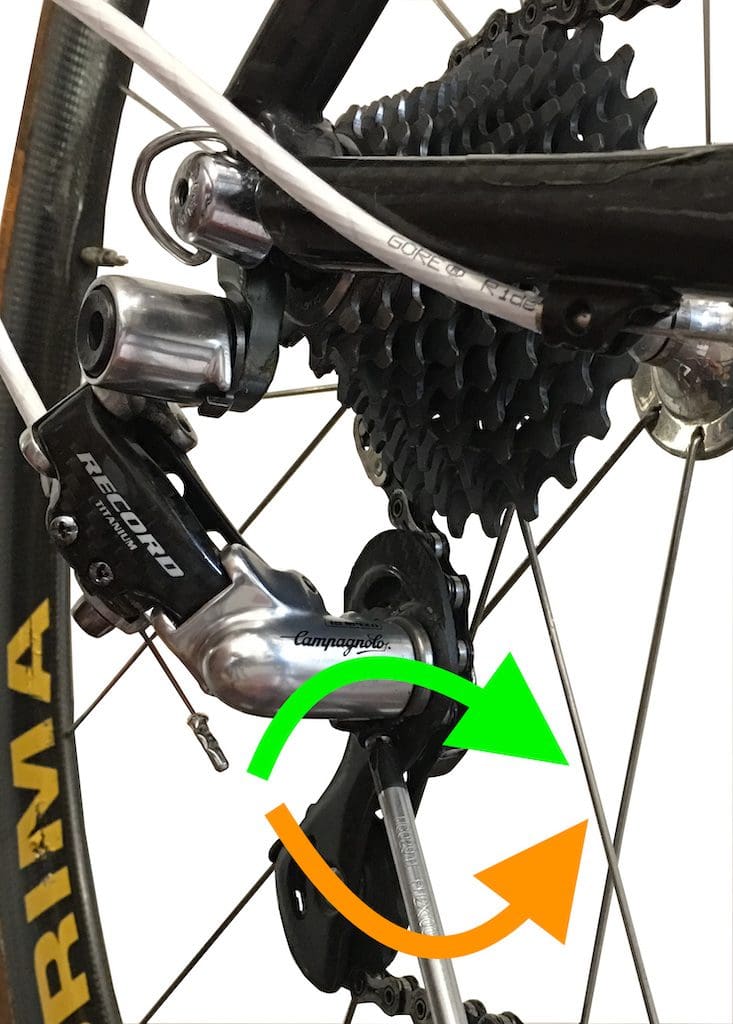
Stage 16
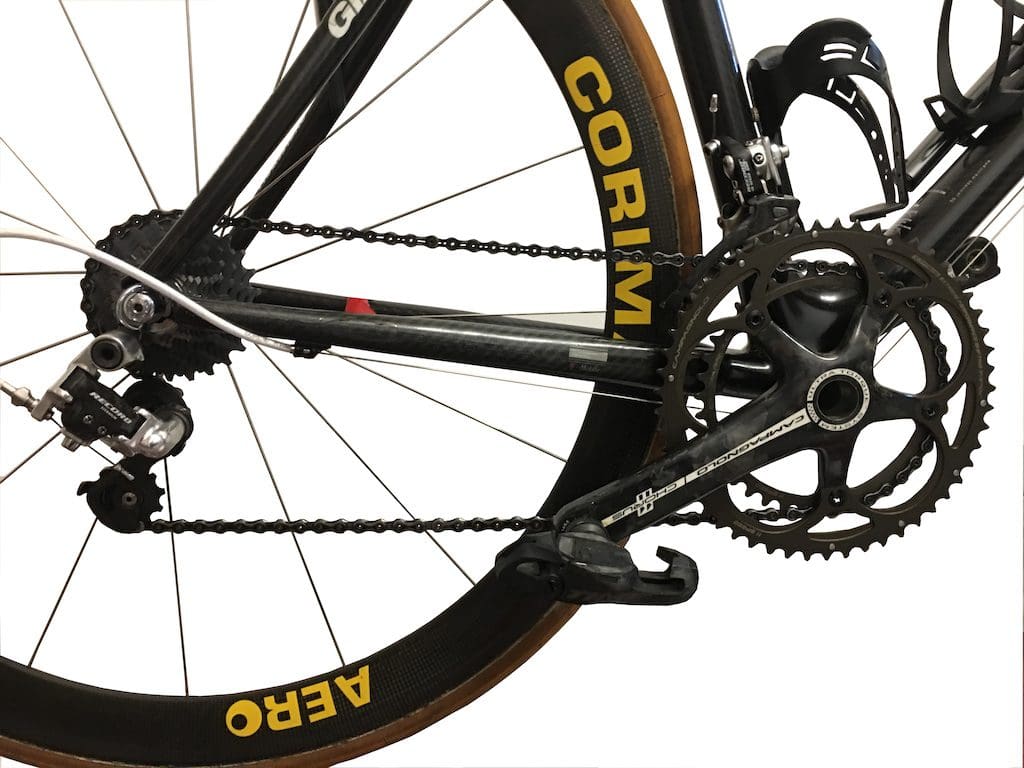
We place the chain on the greatest development, large chainring-small sprocket.
We make sure that the fork (external edge) passes near the chain without touching it.
If we tighten the « B » screw (green arrow) we bring the fork closer to the chain. If we loosen the « B » screw (orange arrow) we move it away.
The adjustment of the Campagnolo derailleurs is complete, all that remains is to adjust the indexing now.
En savoir plus sur Dimensions Vélo
Subscribe to get the latest posts sent to your email.


Laisser un commentaire